
Filmomat PhotoPlug - OPTICAL SHUTTER SPEED TESTER


The PhotoPlug by Filmomat is a small light sensitive sensor which plugs into the headphone-
jack of your smartphone. Together with the Shutter-Speed App (available FREE on
the iOS and Android AppStore), it transforms your smartphone into an optical
shutter speed tester for analog cameras.
Shutter-Speed App for Apple Appstore:
https://apps.apple.com/us/app/shutter-speed/id560154244?l=de&ls=1
Shutter-Speed App for Google Playstore:
https://play.google.com/store/apps/details?id=com.plug.photo.shutter_speed
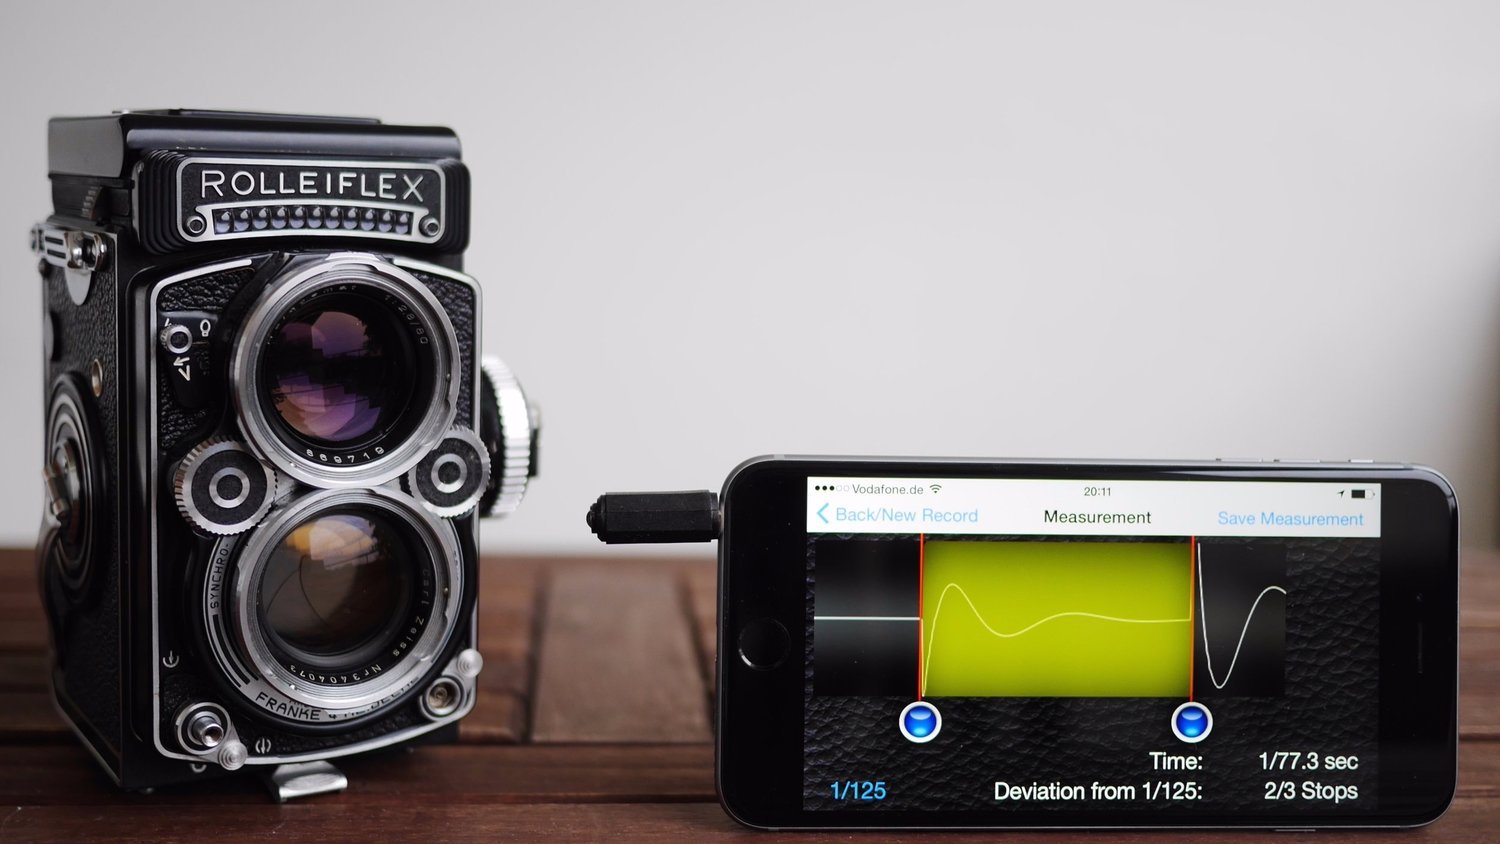
• The Plug contains a small light-sensitive element which converts light into
electrical signals. All you have to do is open the back of your camera, place it
with the lens towards a bright light source, and position the PhotoPlug behind it.
When you release the shutter, the light travels through the camera shutter and hits
the PhotoPlug. The PhotoPlug measures the duration of that light pulse - which is
equivalent to the shutter speed of your camera.
• The PhotoPlug is only 2cm short and perfectly fits in every pocket. It doesn’t require any batteries, so you can always have it on hand when you need it. This allows you to use it wherever you are, like when buying a used camera in a flea market.
• Once you have taken a measurement, the Shutter-Speed App will display the measured shutter speed of your camera. It will also calculate a deviation value in f-stops. Example in the picture: You selected 1/125sec on your camera. Your measurement tells you it is actually 1/80sec. This results in an overexposure of 2/3 f-stops!
STEP BY STEP PROCEDURE
1. CONNECT
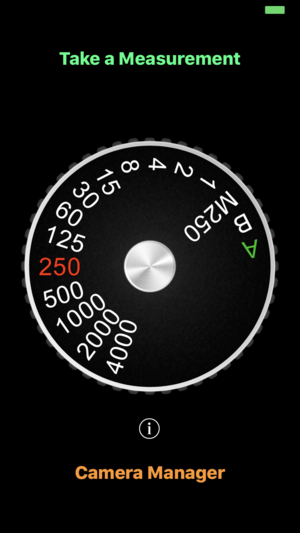
• Go to the “Camera Manager” to add/remove cameras that you want to check.
• Connect the PhotoPlug to the Smartphone and select “Take new Measurement”.
2. SETUP THE MEASUREMENT
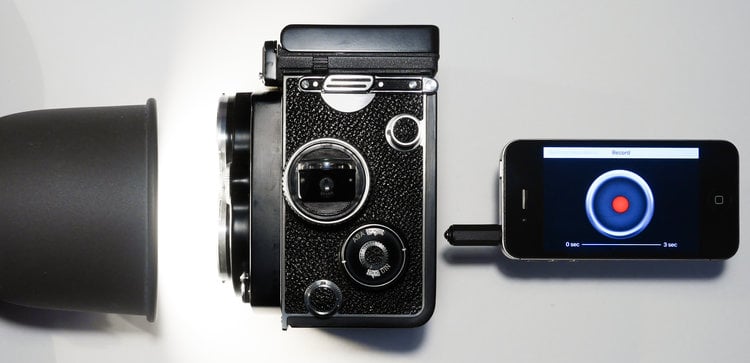
• Open/Remove the camera back.
• Point the camera towards a bright light source.
• Position the PhotoPlug behind the camera shutter.
• Press the aperture symbol (turns red) and release the camera shutter.
3. ANALYZE THE MEASUREMENT
• The App displays a waveform with two peaks.
• Zoom into the signal (two finger pinch) to maximize the signal to the full screen
width.
• Select the target shutter (the speed you set on your camera) on the bottom left
corner.
• Use the two blue sliders to measure the distance between the two peaks.
Measure from the start of the first peak to the start of the second peak.
4. SAVE THE DATA
• Select “Save Measurement” to save the measured shutter speed. You can select
from a list of cameras, that you previously added in the “Camera Manager” (see
step 1). You can override individual values by saving another measurement to the
same camera and shutter speed.
5. VIEW THE DATA
• After you saved the data, you can view it in the Camera Manger.
• The Correction value is given in thirds of an f-stop. “+1” tells you to open the aperture by 1/3 f-stops in order to get a correct exposure. On the other hand, “-2” tells you to close the aperture by 2/3 f-stops.


